Introduction
This guide outlines the process for linking your Zuora account with Anrok. This will allow you to automatically synchronize transactions and update sales tax to your Zuora invoices, credit memos, and debit memos.
Prerequisite
Confirm Connect Tax Engine feature is enabled in Zuora
For some accounts, the Connect Tax Engine feature is enabled automatically. If not, then Zuora may take a few days to approve this change, so we recommend checking this feature in advance of the rest of this guide.
- In Zuora
, click the user name at the top right and navigate to Settings > Billing.
- On the Billing Settings page, click Manage Features.
- Scroll down and check that Connect Tax Engine is enabled.
- If not, click Enable.
After clicking enable, you will see either a Waiting for Approval or Enabled status. If your Zuora tenant is Waiting for Approval, your status should update to Enabled within 1-3 business days.
Step 1
Create an API user role in Zuora
You will need a user with administrator access to your Zuora tenant in order to proceed.
- Log in to Zuora
- Click on the user name in the very top right of the Zuora app and click Administration under the settings icon.
- In the Administration Settings page, click Manage User Roles.
- On the Manage Roles page, click Add New Role.
- In the Basic Info section on the New Role page, enter
Anrok API Userin the Role Name. - In the Platform Permissions section, select:
- API Write Access
- Run Data Queries (in UI or API)
- Events & Notifications View Access
- Events & Notifications Resend Access
- Events & Notifications Manage Access
- Leave the UI Access box unchecked.
- Click Save
Step 2
Create an API user for Anrok
- Click the user name at the top right and click Administration.
- On the Administration Settings page, click Manage Users.
- On the Users page, click Add Single User to create a new user.
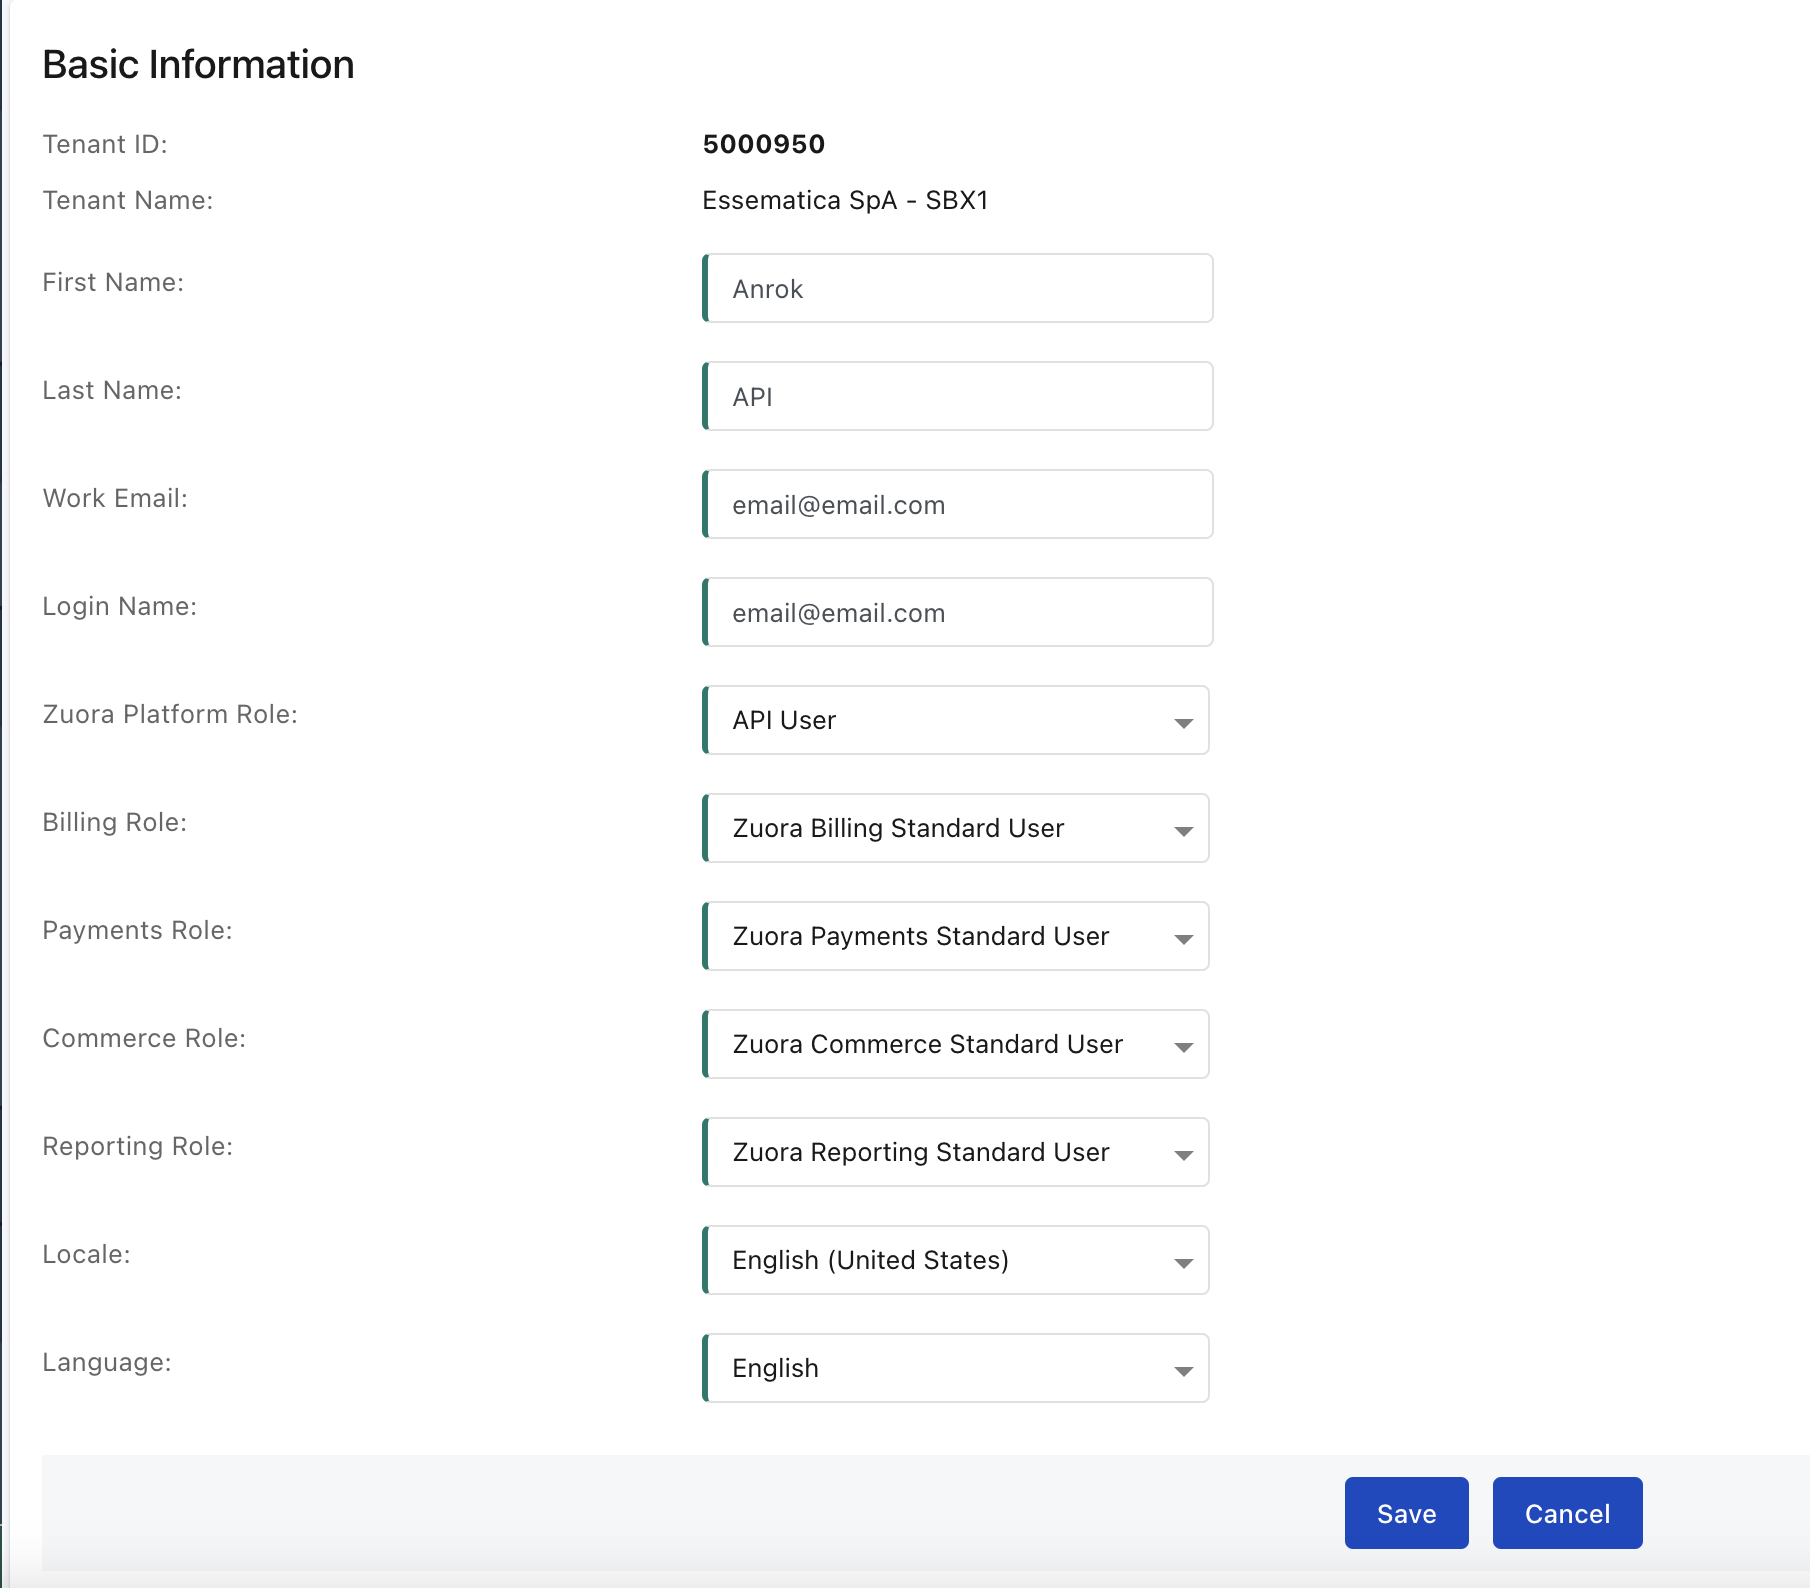
- Fill in the following fields:
- First Name:
Anrok - Last Name:
API - The user Work Email and Login Name can either be an integration service user email on your end or you can use our integration service user billing-integration-support@anrok.com.
- If you use the Anrok integration service user, we recommend appending a company code to the end of the email name. To find your Company Code, head back to the Anrok app
Data sources. Take me there!
- Make sure you are in the right Anrok environment for this particular connection. If you have multiple Anrok environments, toggle in the upper left to the correct account.
- In the URL bar of Anrok, your company code will be the text highlighted in green: app.anrok.com/copy-this-code/data-sources
- The final formatting of the integration service user will be: billing-integration-support+put-code-here@anrok.com
- If you use the Anrok integration service user, we recommend appending a company code to the end of the email name. To find your Company Code, head back to the Anrok app
- Select Anrok API User for the Zuora Platform Role option.
- Leave the rest of the roles as Standard User roles.
- First Name:
- Click Save to create the user.
Step 3
Respond to the Zuora invitation
- Visit the email inbox of your integration service user. Copy and paste the set password link into a new browser window set to INCOGNITO MODE.
- Follow the instructions after copying the link into an incognito browser to set up the Zuora user.
- Since UI access is not enabled for this user, the error message at the end of the setup flow is expected and can be ignored.
Step 4
Create an OAuth client
- Head back to your main Zuora administrator account in the normal browser window. Click the user name at the top right and click Administration.
- On the Administration Settings page, click Manage Users.
- Click on any linked field for the Anrok API user.
- Scroll down to the New OAuth Client section. For Client Name, use
Anrok OAuth Client. - If you have multi-entity features enabled, select which entities the OAuth client will be permitted to access.
- Click Create. Zuora will display the Client ID and Client Secret for the OAuth client. This is the only time you can see the Client Secret. Please save both the Client ID and Client Secret securely in a private note.
- Click OK.
Step 5
Create and configure the Anrok tax code
- Click the user name at the top right and navigate to Settings > Billing.
- Click Set Up Taxation Codes.
- Click Add New Tax Code.
- Enter the following information in the Basic Information panel:
- Tax Code Name:
Anrok - Tax Engine: Select Zuora Tax
- At the bottom of the page in the Zuora Tax Engine: Tax Rates section, click the link to download the Tax Rate Import File.
- Click Choose File and re-upload the file you just downloaded without modifying it.
- Click Import Tax Rates.
- Click Ok.
- Tax Code Name:
- Click Save.
Step 6
Activate the Anrok tax code
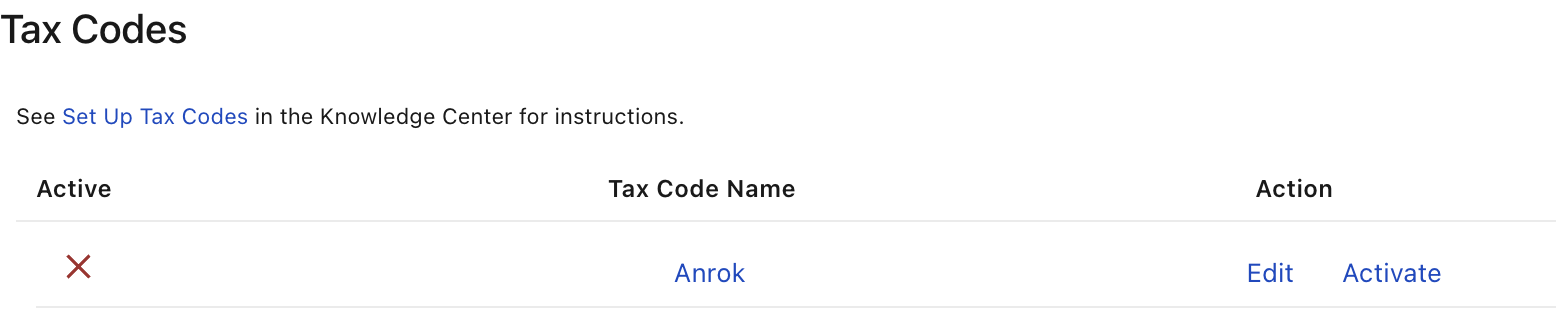
- In the upper left, click < back to Tax Code list and click Activate to activate the Anrok tax code if not already active.
Step 7
Connect to Anrok
- In the Anrok app
- Select Integrate system, then under Accounting time zone, select the time zone that matches your Zuora account.
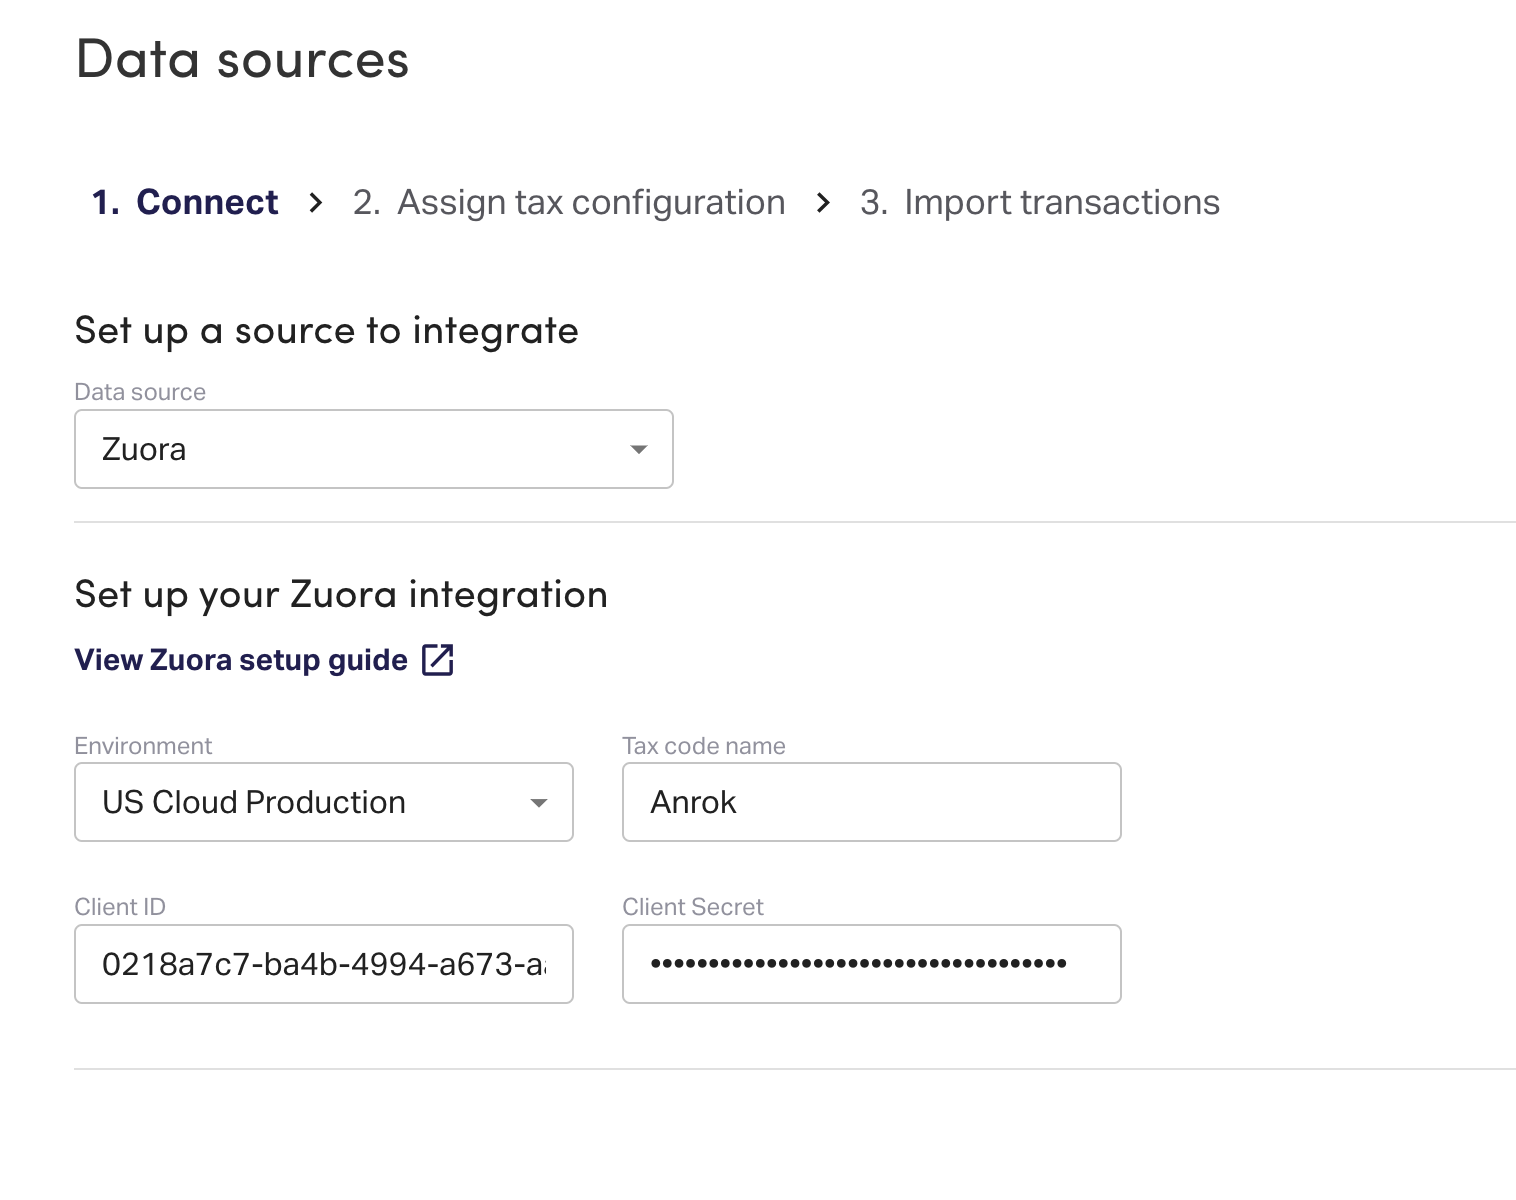
- Under Data source, select Zuora.
- Select the Environment to match your Zuora URL bar. Input the Zuora Client ID, the Zuora Client Secret, and the Tax Code name (should be
Anrok). - Click Connect to finalize the connection. During connection, Anrok will automatically mark Zuora products as "Taxable" within the selected environment. Anrok will also automatically set up Zuora event triggers.
Step 8
Add your Zuora products as product IDs
In Anrok, your Zuora products will be called product IDs. These product IDs are the key drivers for calculating taxability. It's important that you add your current and previous Zuora products into Anrok. See What are product IDs?
Try adding your Zuora products in the demo above ☝️
- Under New products detected, select a corresponding Product type and Tax category for each product detected. See What tax configuration should I select?
- If you'd like to assign a Product type and Tax category to multiple products at once, click the checkbox
next to each product, then select Batch assign.
- When you are finished, scroll down and click Continue.
Step 9
Import your Zuora transactions
Now that you've assigned all of your product IDs, you can begin importing your historical transactions from Zuora into Anrok.
Try importing your Zuora transactions in the demo above ☝️
-
Under Select transactions to import, select one of the following options:
- Import all past transactions — all transactions will be imported into Anrok. This will result in a complete picture of your economic nexus and exposure.
- Import transactions from a specific date — some past transactions will not be imported into Anrok. This may result in an incomplete picture of your economic nexus and exposure to date.
- Continue without importing past transactions — none of your historical transactions will be imported into Anrok. This may result in an incomplete picture of your economic nexus and exposure.
- Select Import transactions (or Mark as finished depending on your previous selection).
- When your transactions have finished importing, select Mark complete.
Step 10
Generate an Anrok API key
- In the Anrok app
- Under Integration sources, click the option menu button
next to Zuora, then select Manage Anrok API key.
- Click Generate Anrok API key, then copy
the API key.
- When you are finished, click Done.
Step 11
Set up the Anrok tax engine
- In Zuora
- On the Billing Settings page, click Manage Features.
- Scroll down and check that Connect Tax Engine is enabled. If not, click Enable.
- Head back to the Billing Settings page and click Set Up Tax Engine and Tax Date.
- Click Setup New Tax Engine and select Anrok from the dropdown list.
- Engine Name:
Anrok - Authentication Type: Private Token
- Security Token: paste your Anrok API key from the previous step.
- Engine Name:
- Click Test Connection to validate the API key.
- To find your Company Code, head back to the Anrok app
- Make sure you are in the right Anrok environment for this particular connection. If you have multiple Anrok environments, toggle in the upper left to the correct account.
- In the URL bar of Anrok, your company code will be the text highlighted in green: app.anrok.com/copy-this-code/data-sources
- Click Save.
Step 12
Associate the Anrok tax code with the Anrok tax engine
- In Zuora
- On the Billing Settings page, click Set Up Taxation Codes.
- Click Edit next to the Anrok tax code.
- Set the Tax Engine to Anrok.
- Select the External Company Code that you set up in the previous step.
- Click Save.
Step 13
Go live with Anrok for live tax collections and real-time data sync
Important: This is the go live step. Completing this step will overwrite any prior tax system that you have in Zuora and replace that with the Anrok tax system. This step should be completed when you are ready to use Anrok for live tax collection in Zuora.
- In the Anrok app
- Under Integration sources, click the option menu button
- When you are ready to set up the Anrok webhooks for real-time data sync click Recreate webhooks in the Webhooks section.
- When you are ready to update all Zuora products to use Anrok as their tax code and overwrite any pre-existing tax codes that you have in Zuora, click Fix issue in the Prices section. Click Refresh to confirm that all products have been successfully updated.
- After this step has been completed Anrok will sync Zuora data in real-time to Anrok and will use the Anrok tax code as the tax code for all products in Zuora.
Step 14
Add the Canada provincial tax ID custom field (Optional)
- In Zuora
- On the Billing Settings page, click Manage Custom Fields.
- Click the Edit icon next to the Account object.
- Click the + icon to create a new custom field.
- Name: Province Tax ID
- API Name:
provinceTaxID__c - Field Type: Text
- Max Length: 255
- Click Save & Close.
- In Zuora, click the user name at the top right and navigate to Settings > Billing.
- Click Set Up Tax Engine and Tax Date.
- Click on Anrok.
- Scroll down to Advanced Settings and toggle on.
- Click + Custom Fields on the right to add a custom field and click + Select.
- Check the box next to Province Tax ID and click Done.
- Click Use Default Template.
- Scroll back up to the top of the page and click Save to confirm selection of the custom field.